Friday, June 16, 2017
DIY Chalkboard Cabinet
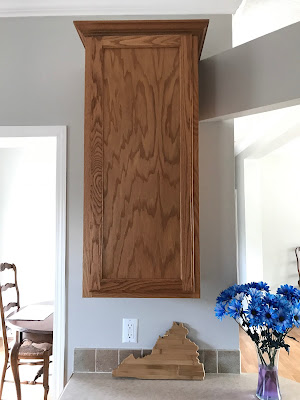
One of the weird little quirks in our new house was this random cabinet. Don't get me wrong, I would never complain about having extra cabinet space, but this one just looked so out of place since it wasn't really connected to anything else.
I debated removing the door so it was just open shelves, but then I realized I wouldn't be able to hide any clutter. If you know me at all, you know I hate clutter. Inspired by one of my fellow DIY-loving friends, I decided to keep the cabinet in tact and turn the door into a chalkboard!
This project was incredibly easy and cheap, coming in at a grand total of $6.98! I bought this chalkboard wall sticker from Amazon, and it came with colored chalk so that was all I needed.
Sidetone: Anyone else completely obsessed with Amazon Prime? Not sure how my poor, impatient soul ever lived without it.
All I had to do was measure the cabinet, cut the sticker to size, and stick it on! I started at the top and only peeled off a small area of the backing at a time as I worked my way down. This method was surprisingly easy, and I was able to smooth out the very few bubbles that came up as I applied it. The whole process took less than ten minutes to complete; it took me way longer to decorate it!
...and now I'm spending the remainder of my day looking up chalkboard ideas on Pinterest.
P.S. Today marks exactly one year until our wedding! Now that I'm off for the summer, planning is in full force. Sorry, bank account!
Subscribe to:
Post Comments (Atom)
-
I don't know about you, but this time of year always gets me in such a blah mood. The excitement of Christmas and New Years is over, mos...
-
Happy New Year, friends! I'm more than excited about 2018 because I'm getting married! Don't get me wrong, 2017 was a great year...


No comments:
Post a Comment